You've found an AI video tool, saved some faceless channel examples, and started wondering whether you could publish without recording yourself. The tempting next move is to generate a pile of videos. The better move is to decide what you'll contribute that another creator can't reproduce with the same prompt.
Learning how to create a faceless YouTube channel starts with editorial decisions, not automation. Your face can stay off camera, but your judgement needs to be visible in the research, examples, narration, and editing.
Table of Contents
- The Launch Workflow From Niche to First Upload
- Build an Original Editorial System
- Disclose AI Use and Pick a Narration Format
- Monetization Thresholds and Revenue Paths
- Produce Faceless Videos With Revid and AI Tools
- Track the Right Metrics and Start Your First Batch
The Launch Workflow From Niche to First Upload
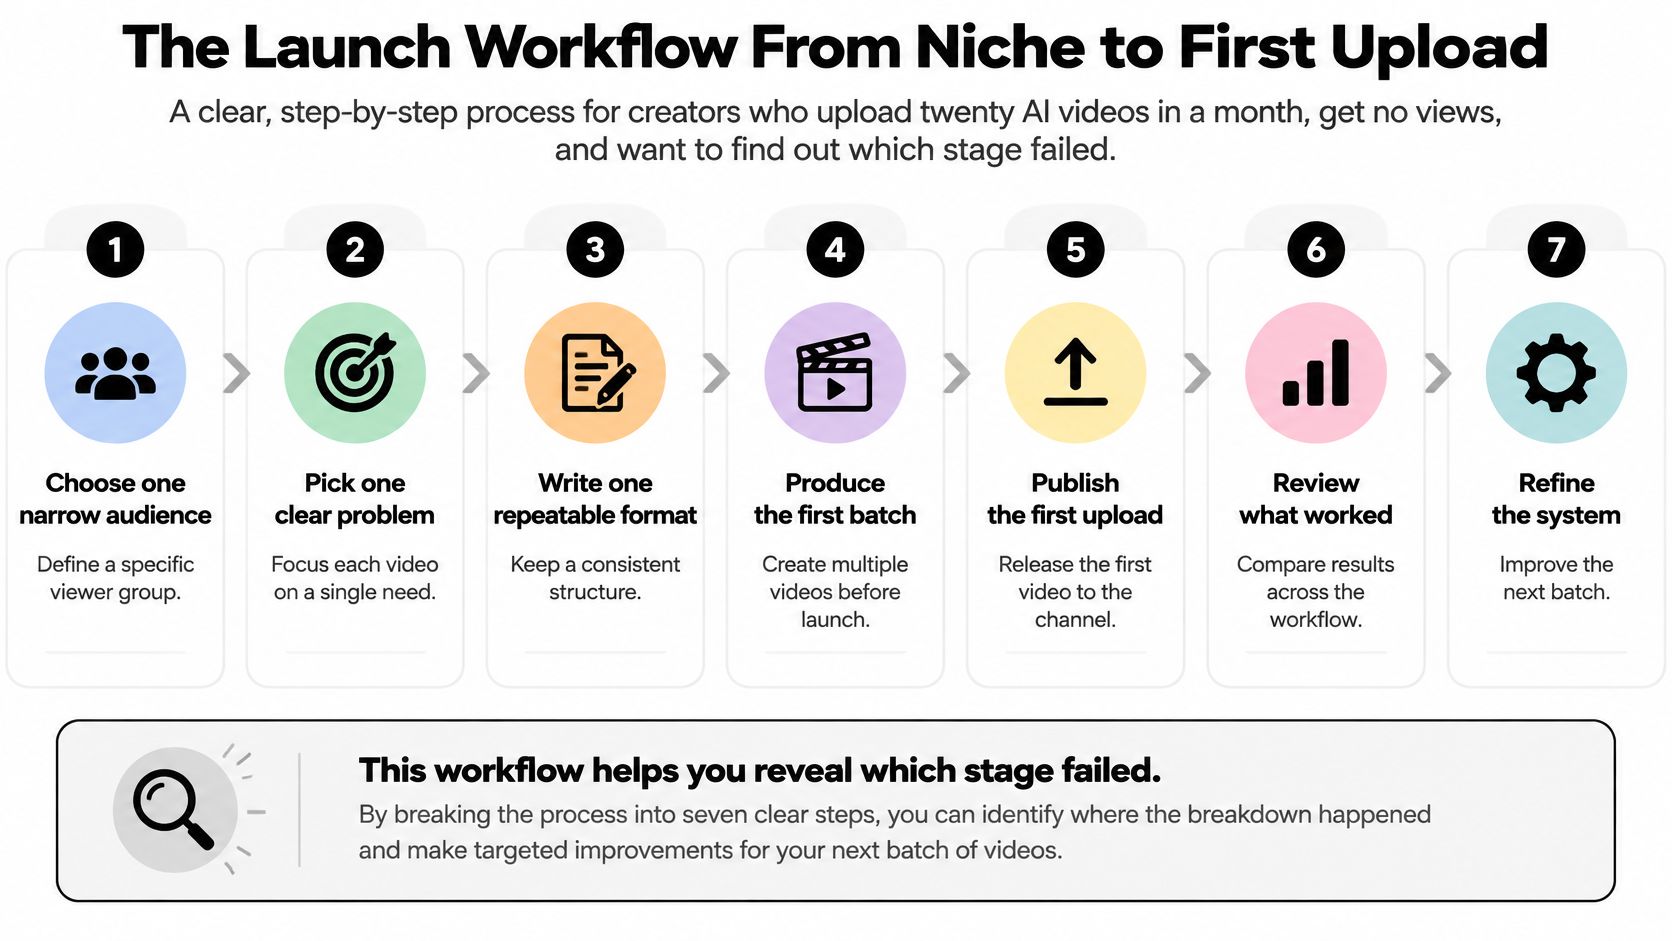
Say you upload twenty AI-generated videos in a month and barely attract viewers. That's a hypothetical production sprint, not a useful experiment: without checkpoints, you won't know whether the audience, script, packaging, or finished video failed.
Faceless changes the presentation format, not the monetization requirements or policy obligations. Build a workflow that lets you evaluate both creative quality and channel readiness before increasing output.
Follow a traceable production sequence
- Choose a narrow audience and problem. Software tutorials for freelance designers give you clearer editorial boundaries than general technology videos. Write down what viewers should be able to do after watching.
- Develop an original thesis and sourced script. Decide what you're arguing before asking AI to draft anything. Keep factual claims beside their supporting sources so verification doesn't become a separate reconstruction job.
- Produce narration and a visual draft. Use AI tools to assemble a starting point, then replace interchangeable stock clips with demonstrations, diagrams, or comparisons that explain your argument.
- Edit and inspect the material. Remove repetition, check generated scenes for misleading details, and verify that borrowed material has an appropriate role and permission.
- Package the finished promise. Write a title and thumbnail that describe the actual payoff. Use the description to provide context and credit sources, not to rescue an unclear video.
- Complete disclosure and publishing checks. Review realistic synthetic elements, captions, audio, and channel settings before making the upload public.
- Record the starting measurements. Prepare fields for subscribers, qualified watch hours, qualified Shorts views, and compliance checks before publishing, then update them as results arrive.
The workflow below provides a compact launch-and-refine view.
Create the channel through YouTube, choose a readable name and handle, and add a description identifying the audience and subject. Keep the banner simple enough that visitors understand what you publish without deciphering a slogan.
Practical rule: Don't automate a production stage until you can describe what a good result from that stage looks like.
Measurement starts before launch because you need a consistent record of what you changed. Otherwise, a disappointing upload encourages random fixes rather than a useful diagnosis.
Build an Original Editorial System
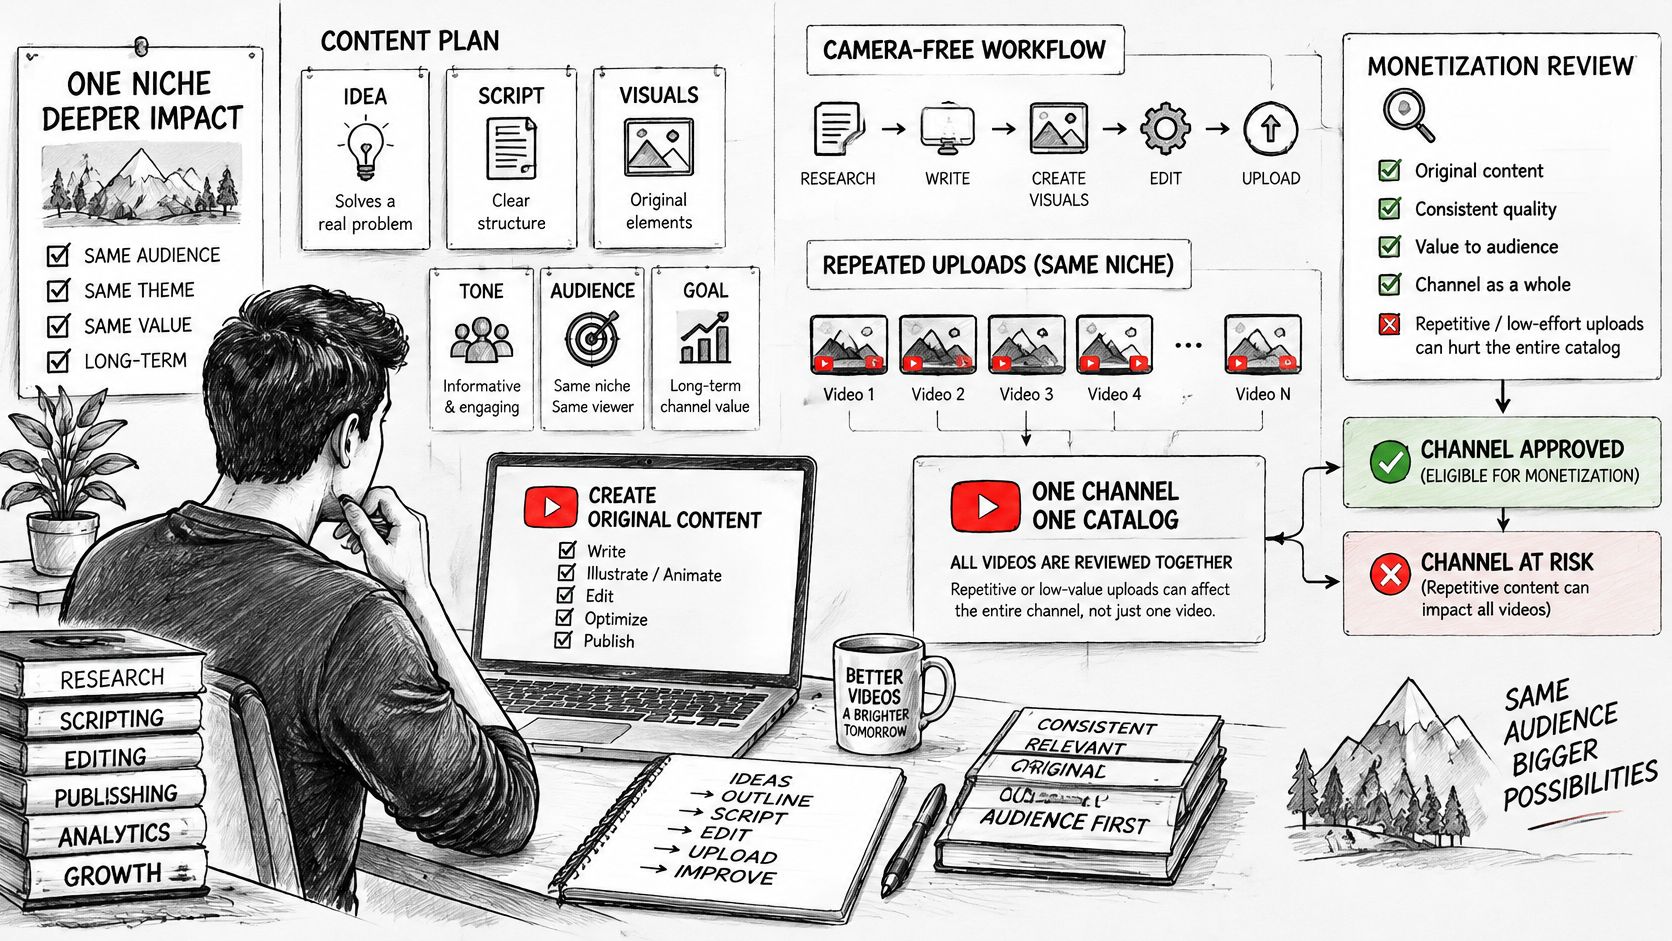
YouTube reviews the channel as a whole, not merely the upload you consider your best work. Its channel monetization policies identify repetitive, mass-produced, and insufficiently transformed material as monetization risks, and explain that permission to reuse content doesn't automatically satisfy the reused-content standard.
That makes anonymous content aggregation a poor foundation. A folder full of licensed clips establishes usage rights, but it doesn't establish meaningful authorship.
Put editorial decisions in writing
Copy these fields into your planning document:
- Audience and need: Identify the viewer, their current knowledge, and the problem the video resolves.
- Original thesis: State the conclusion you'll defend, including any trade-off or limitation.
- Evidence: Keep source links, relevant passages, and notes explaining what each source supports.
- Commentary: Mark where you interpret, challenge, compare, or demonstrate rather than summarize.
- Visual treatment: Specify the chart, recording, annotation, or illustration needed to explain each important claim.
- Authorship record: Retain script revisions, narration files, visual project files, and asset licences.
This diagram shows how those decisions connect to production.
Consider a hypothetical finance explainer comparing debt repayment approaches. A generic version paraphrases familiar advice over footage of banknotes. A stronger version builds a worked spreadsheet calculation, explains its assumptions, and states why the creator would choose a particular approach under those assumptions.
The calculation and judgement add substance. Replacing the voice and background footage while keeping a near-identical script would leave the weaker version looking mass-produced.
Audit the contribution, not just the files
Before approving an upload, ask:
- Script overlap: Does this repeat another upload with only nouns and examples swapped?
- Pacing: Have you imposed identical scene changes where the explanation needs a different rhythm?
- Visual purpose: Does each important visual teach something, or merely fill the screen?
- Borrowed clips: Can viewers identify the analysis you added?
- Viewer payoff: What can someone understand or do afterward that the source material alone didn't explain?
Avoid scraped articles read by synthetic voices, minimally edited social-media footage, and compilations without substantive commentary. Adding an introduction doesn't necessarily transform the material that follows.
A repeatable format should preserve your editorial standards, not reproduce the same argument with different keywords.
Keep project files as a practical authorship record, not a promise of approval. Reviewers still need to recognize the original contribution in the published videos themselves.
Disclose AI Use and Pick a Narration Format
YouTube requires disclosure for realistic altered or synthetic content, and its altered-content guidance says disclosure itself doesn't restrict a video's audience or monetization eligibility.
Choose a narrator based on credibility and production control, not just convenience. A human voice can sound unpolished but convincing; synthetic narration can sound polished while mispronouncing the term that matters most.
Narration and presenter formats compared
| Format | Disclosure need | Policy risk | Trust signal |
|---|---|---|---|
| Human voice, no face | Not needed for your own unaltered narration | Standard originality review applies | Clear sourcing and a consistent narrator |
| Licensed synthetic voice | Check whether realistic synthetic audio meets the disclosure rule, especially impersonation | Standard originality review applies; licensing doesn't excuse deception | Visible sourcing and corrections |
| AI avatar presenter | Required for realistic synthetic people | Avoid personas falsely posing as human experts on health, law, finance, or politics | Weakest on sensitive topics when credentials are unclear |
| Fully generated video | Required when realistic and meaningfully synthetic | Mass-produced, generic output can be rejected | Original insight supported by inspectable evidence |
A synthetic voice licence and a disclosure decision solve different problems. The licence concerns permitted use of the voice; disclosure concerns how viewers understand what they're hearing or seeing. Don't assume every AI-assisted production choice requires identical treatment.
Make trust inspectable
Use human-reviewed scripts, sources viewers can inspect, and a consistent narrator identity. If a factual correction changes the conclusion, explain the correction in the description or an appropriately prominent update rather than replacing a sentence.
Don't invent credentials for an avatar. On sensitive subjects, a fictional presenter with a professional title can imply authority the channel doesn't possess; use a clearly identified narrator and make the limits of the explanation explicit.
I would start with your own voice if you're comfortable recording it. You can revise a sentence naturally, emphasize uncertainty, and explain your reasoning without directing a synthetic performance.
If you choose synthetic narration, listen for numbers, abbreviations, names, and changes in emphasis. Transparency can distinguish your channel, but it won't compensate for inaccurate scripts or a presenter who implies expertise you can't substantiate.
Monetization Thresholds and Revenue Paths
There are separate milestones for earlier Partner Programme access and full advertising revenue. The expanded Partner Programme guide sets the early tier at 500 subscribers, qualifying recent uploads, and a viewing requirement; the standard Partner Programme overview sets full ad sharing at 1,000 subscribers plus the qualifying long-form or Shorts requirement shown below.
Monetization milestones for a faceless channel
| Milestone | Subscribers | Viewing requirement | What it unlocks |
|---|---|---|---|
| Early Partner Programme tier | 500 | At least 3 valid public uploads in the previous 90 days, plus either 3,000 qualified public watch hours in 12 months or 3 million qualified Shorts views in 90 days | Earlier access to eligible channel features, not full ad sharing |
| Full ad revenue | 1,000 | Either 4,000 qualified public watch hours in 12 months or 10 million qualified public Shorts views in 90 days | Ad and YouTube Premium revenue sharing |
Shorts-feed watch time doesn't count toward the long-form watch-hour requirement. Don't combine those dashboard totals and assume you're closer to eligibility than you are.
Choose the route your audience supports
Long-form production requires viewers to stay through an explanation. That means delivering the promised answer promptly, removing unnecessary setup, and developing enough substance to justify the remaining runtime.
A Shorts-led approach needs broad reach within a compressed eligibility window. A short clip that attracts casual viewers isn't automatically a reliable bridge to detailed tutorials, so assess whether viewers follow that path.
Beyond audience thresholds, check these account requirements:
- Location: Your country or region must be eligible.
- Account standing: You need no active Community Guidelines strikes.
- Security and access: Enable two-step verification and obtain advanced-features access.
- Payments: Have an active linked AdSense for YouTube account, or be ready to set one up through the application process.
Reaching a threshold makes you eligible to apply, not guaranteed approval. Keep editorial compliance separate from your growth targets so a rising subscriber count doesn't conceal a weak catalog.
Business judgement: Choose a format because viewers use it, not because a production tool makes it easy to generate.
Plan additional revenue paths that fit the audience. Software demonstrations might support relevant affiliate commissions; a focused educational channel might support sponsorships, a digital worksheet, or a service.
Treat each as a separate offer with its own costs and responsibilities. Advertising eligibility is a milestone, not a forecast of sustainable income.
Produce Faceless Videos With Revid and AI Tools
For a hypothetical explainer, prepare the script, source document, and visual notes before opening the generator. Revid focuses on short-form content, so don't assume a long explanation should become a single uninterrupted generation; build manageable sections and assemble them in an editor when necessary.
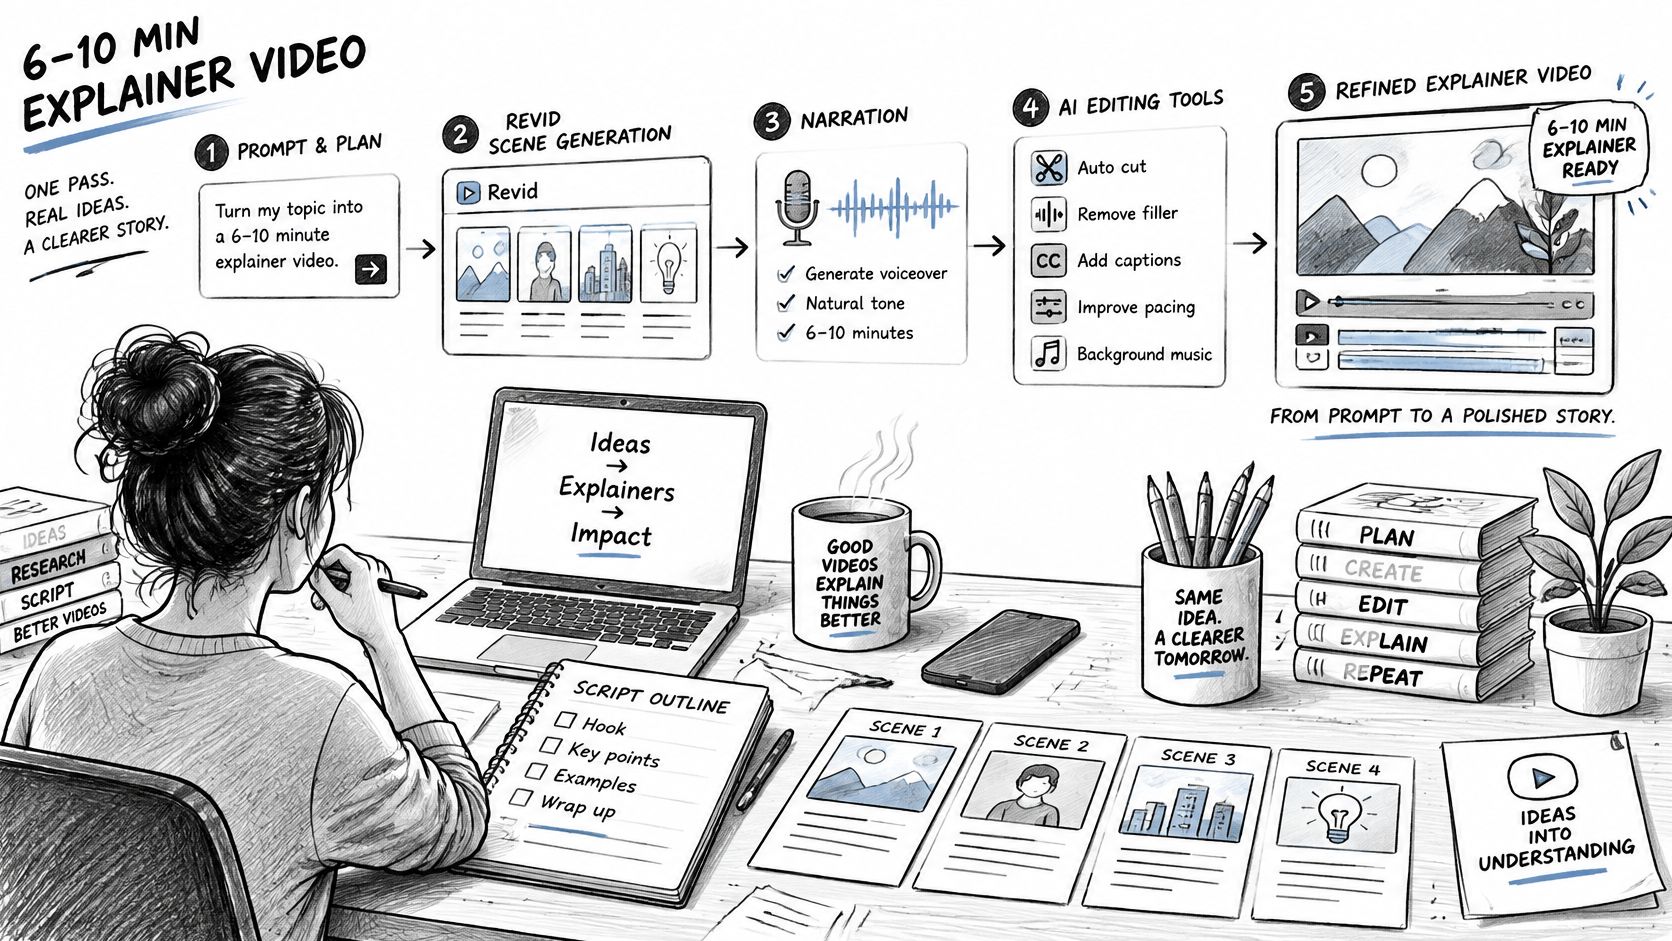
Use this production pass as a working checklist.
Build and inspect the draft
Start with the finished argument. Supply your script or a detailed scene prompt rather than a broad topic. Check the generated narration against your approved text, especially qualifications such as “may,” “under these assumptions,” and “excluding fees.”
Replace generic scenes with evidence. A budgeting explanation needs labelled calculations, not an endless sequence of people checking phones. Make a scene list pairing each claim with a screen recording, custom graphic, or clearly illustrative image.
Choose a stable narration voice. Keep the channel's narrator recognizable, but adjust delivery to the material. Preview technical terms and listen for pauses that accidentally change the meaning of a sentence.
Edit for comprehension before decoration. Cut repeated explanations and leave diagrams visible long enough to understand. In CapCut or DaVinci Resolve, align caption breaks with complete thoughts rather than accepting every automatic line break.
Revid's prompt-based generation can reduce assembly work, but the generated draft still needs direction. Prateek Singh's Trustpilot review describes prompt-to-video creation, generated social titles and descriptions, and auto-posting; that's a report of convenience, not evidence that an unattended upload will meet your editorial standards.
The video below provides another view of the production process.
Approve the video before batching
Export and review in separate passes. Watch muted to check whether the visuals form a coherent explanation, then listen with sound to evaluate narration and timing. Inspect captions for incorrect names, cropped text, and contradictions between the spoken sentence and displayed image.
Batch only an approved format. Reuse project organization, caption styling, and export settings, but commission new visual reasoning for each topic. Andrew Mewborn's Product Hunt review praises rapid batch creation; treat that as an individual testimonial, not a production-time promise or a reason to skip review.
Write metadata after the final cut. Put the specific search topic naturally in the title, give the thumbnail a readable central idea, and list the sources used in the description. Compare the opening and conclusion against that promise before scheduling publication.
Our collection of public Revid reviews links readers to original testimonials so they can inspect the context behind individual claims.
Automation works best on assembly, not accountability. You remain responsible for whether a chart is accurate, a synthetic scene is misleading, or a title promises an answer the finished video never delivers.
Track the Right Metrics and Start Your First Batch
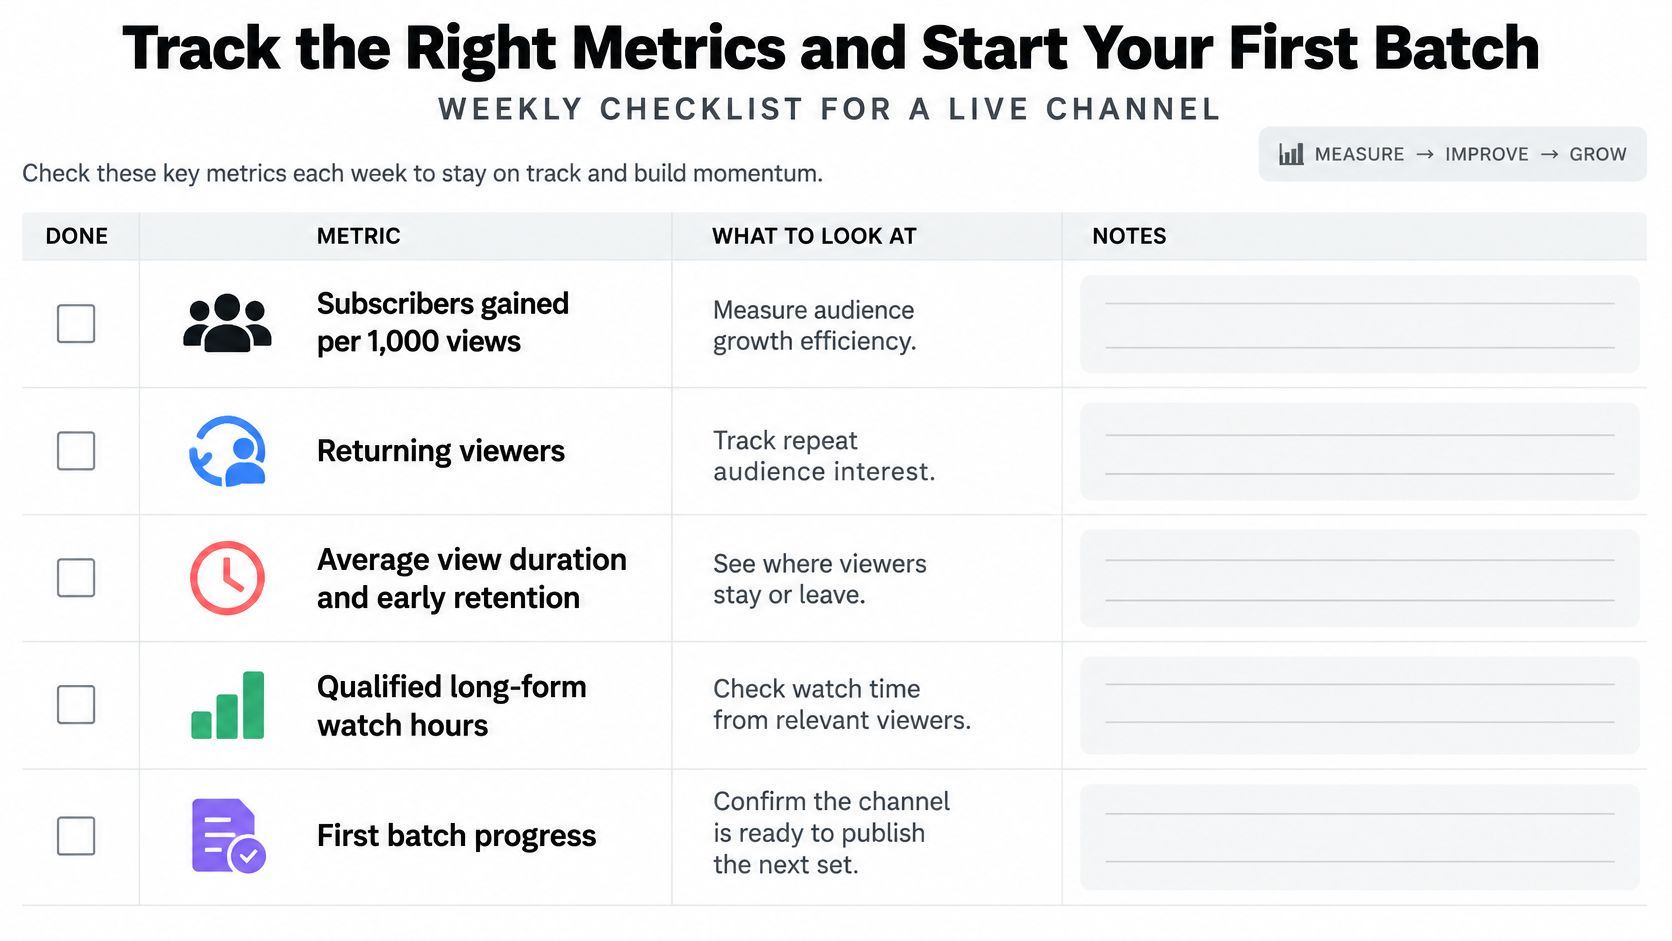
Review channel performance weekly with a compact checklist:
- Subscriber conversion: Compare subscribers gained with views to assess whether viewers want more.
- Returning viewers: Look for repeat interest rather than isolated clicks.
- Viewing quality: Inspect average view duration and early retention for confusing openings or delayed answers.
- Eligibility progress: Track qualified long-form watch hours or qualified Shorts views separately.
- Economics: Record revenue by source and production cost per published minute, including revision time.
Keep the checklist beside your production board.
For a manageable launch experiment, make a small batch in the same niche, with each video answering a different viewer question. Apply the originality audit before publishing, then compare retention once the uploads have attracted enough viewing to reveal useful patterns.
Don't declare a format successful from a handful of views. Diagnose whether people declined the packaging, left during the opening, or watched but didn't return, then change the relevant production decision.
Verify current requirements through YouTube's Partner Programme and policy pages linked above before applying or changing your workflow. Publisher disclosure: This guide is published by Revid Reviews, a site run by the Revid team.
Revid Reviews collects public creator reviews and publishes buyer guides covering Revid's capabilities, limitations, pricing, and alternatives. Visit Revid Reviews to inspect the original testimonials and decide whether the tool fits your faceless channel's production workflow before committing to it.